Create a stunning centerpiece for your vintage wedding cake 🍰✨ Perfect for adding timeless beauty to your big day 🎂💍.
Prep Time: 20 minutes | Cooking Time: 30 minutes | Total Time: 50 minutes
Kcal: 360 kcal | Servings: 12 servings
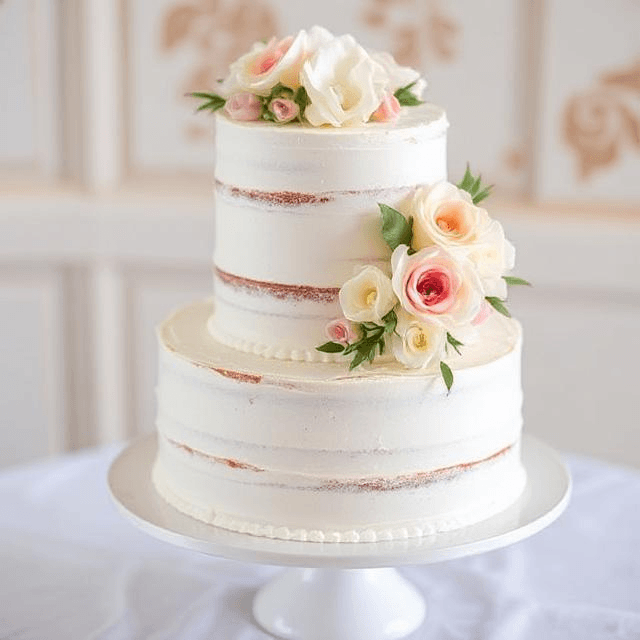
Table of Contents
How to Make a Vintage Wedding Cake
Creating a vintage wedding cake is an art that combines classic elegance, intricate designs, and delicate flavors. Whether you want a cake with vintage lace details or delicate sugar flowers, the process involves careful planning and attention to detail. Here’s a step-by-step guide on how to make a vintage wedding cake that will wow your guests.
Print
how to make a vintage wedding cakes
- Total Time: 50 minutes
- Yield: 12 servings 1x
Description
A vintage wedding cake is the epitome of elegance and timeless beauty. The layers of soft, moist cake paired with delicate whipped cream frosting make each bite a luxurious experience. The fondant finish gives the cake a smooth, polished appearance, while the fresh flowers and edible gold leaf provide a sophisticated touch.
Ingredients
- Ingredients:
- 3 cups all-purpose flour
- 2 teaspoons baking powder
- 1/2 teaspoon salt
- 1 cup unsalted butter, softened
- 2 cups sugar
- 4 large eggs
- 2 teaspoons vanilla extract
- 1 cup whole milk
- 1/2 cup heavy cream
- 1 cup fondant (for decoration)
- Fresh flowers (for decoration)
- Edible gold leaf (for decoration)
Instructions
1. Choose the Right Cake Flavors
Vintage wedding cakes are known for their subtle and delicate flavors. Begin by selecting flavors that are both timeless and sophisticated. Some of the best vintage-inspired cake flavors include:
- Vanilla Bean Cake: A classic flavor that never goes out of style.
- Almond Cake: A nutty, light flavor that adds a vintage touch.
- Lemon Cake: Adds a citrusy freshness, perfect for spring and summer weddings.
- Citrus or Berry Buttercream: Light and refreshing, these fillings complement the cake flavors.
You can mix and match these flavors to create a multi-tier cake with different tastes, ensuring there’s something for every guest.
2. Prepare the Cake Layers
Start by baking your cake layers. For a multi-tiered cake, you’ll need to bake several layers in different sizes (usually 6-inch, 8-inch, and 10-inch). Here’s how:
- Preheat the Oven: Set your oven to the recommended temperature for the cake recipe you’re using (usually around 350°F or 180°C).
- Prepare Your Pans: Grease and flour the cake pans, or line them with parchment paper to ensure the cakes come out easily.
- Mix the Cake Batter: Follow the recipe instructions for your selected flavor. Be sure to sift your dry ingredients and beat your batter until smooth.
- Bake the Cakes: Pour the batter into the pans and bake according to the recipe’s time and temperature. Test for doneness by inserting a toothpick into the center—if it comes out clean, your cakes are done.
- Cool the Cakes: Let the cakes cool in their pans for about 10 minutes before transferring them to a wire rack. Make sure they cool completely before frosting.
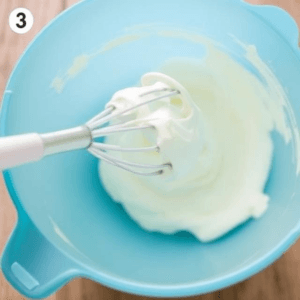
3. Prepare the Buttercream Frosting
Vintage wedding cakes often feature delicate, smooth buttercream frosting. You can choose from different types of buttercream depending on your preference:
- Swiss Meringue Buttercream: Smooth, silky, and less sweet than American buttercream.
- Italian Meringue Buttercream: A buttery, glossy texture perfect for decorating.
- American Buttercream: Sweet and easy to work with, this is ideal for basic frosting and piping.
To make your buttercream:
- Whisk the Egg Whites and Sugar (for meringue buttercreams): Whisk until they form soft peaks.
- Add Butter: Gradually add softened butter to the egg mixture, whisking until smooth and fluffy.
- Flavor the Frosting: Add vanilla extract or any flavoring that complements your cake.
Make enough buttercream to cover all your cake layers and to use for any piping or decorative work.
4. Assemble the Cake
Once your cakes and frosting are ready, it’s time to assemble the cake:

- Level the Cakes: Use a serrated knife to level the tops of each cake layer so they stack evenly.
- Apply a Crumb Coat: Spread a thin layer of buttercream over each layer to seal in any crumbs. Chill the cake for about 30 minutes to set this crumb coat.
- Frost the Cake: After the crumb coat has set, apply a thicker layer of buttercream to the entire cake. Smooth it out with an offset spatula to create a flawless surface.
5. Decorate with Vintage Elements
Now comes the fun part—decorating your vintage wedding cake. There are many vintage design elements you can incorporate, such as:
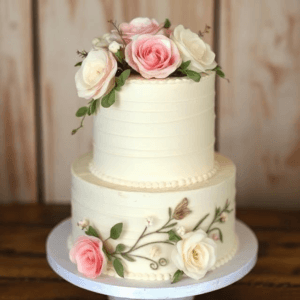
- Edible Lace: Create or purchase edible lace to decorate the sides of your cake. This adds a delicate, vintage touch.
- Sugar Flowers: Handcraft or buy sugar flowers like roses, peonies, or hydrangeas to place on top of or around your cake.
- Piping: Use piping bags to create intricate designs such as lace-like patterns, scrolls, or floral motifs.
- Gold Accents: Add a touch of vintage luxury by painting parts of your cake with edible gold or silver dust.
- Vintage Cake Toppers: For a traditional look, use a vintage-inspired cake topper like a bride and groom figurine or a floral arrangement.
6. Add Final Touches
Once you’ve finished decorating your cake, consider adding some final touches:
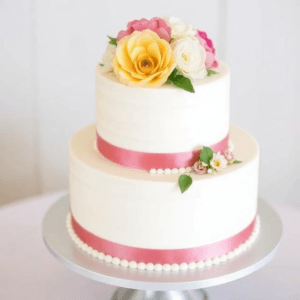
- Fresh Flowers: Incorporate seasonal, fresh flowers such as roses, peonies, or ivy. These can be placed delicately on top or around the base of the cake.
- Ribbons: Wrap satin or lace ribbons around the base of the tiers for a romantic and vintage feel.
- Vintage-Inspired Plates or Stands: Display your cake on a vintage cake stand to enhance the overall vintage aesthetic.
7. Chill and Transport the Cake
Once your vintage wedding cake is completed, let it chill in the fridge for about an hour to firm up before transporting it to your wedding venue. Be sure to place it securely in your car to prevent any damage.
![]()
Notes
Directions:
- Preheat your oven to 350°F (175°C). Grease and flour three 8-inch round cake pans.
- In a medium bowl, whisk together the flour, baking powder, and salt.
- In a large bowl, cream together the butter and sugar until light and fluffy, about 5 minutes.
- Add eggs one at a time, beating well after each addition, then mix in the vanilla extract.
- Gradually add the dry ingredients, alternating with milk, starting and ending with the dry ingredients. Mix until just combined.
- Divide the batter evenly among the prepared pans. Bake for 25-30 minutes, or until a toothpick inserted into the center comes out clean.
- Allow cakes to cool in the pans for 10 minutes, then transfer to wire racks to cool completely.
- Once the cakes are cool, frost with whipped cream and cover with fondant for a smooth finish.
- Decorate with fresh flowers and edible gold leaf for a timeless, elegant touch.
- Prep Time: 20 minutes
- Cook Time: 30 minutes
- Category: Dinner
- Method: No bake
- Cuisine: American
Nutrition
- Serving Size: 12 servings
- Calories: 360 kcal
Keywords: vintage wedding cakes
Conclusion
Making a vintage wedding cake involves more than just a simple baking process—it’s about creating an elegant masterpiece that reflects your style. By choosing delicate flavors, incorporating vintage design elements, and carefully assembling and decorating the cake, you can craft a dessert that’s as beautiful as it is delicious. Your vintage wedding cake will not only be a sweet treat but also a stunning centerpiece that guests will remember long after the celebration ends.